How to create AMP-Friendly WordPress Gallery with ACF & AMP-Carousel
What Will I Learn?
This article demonstrates how to populate AMP-Friendly WordPress gallery using amp-carousel and Advanced Custom Fields plugin.
Requirements:
- AMP for WordPress plugin;
- Basic CSS & HTML knowledge;
- Basic PHP knowledge;
- ACF PRO plugin.
Useful links:
- AMP for WordPress: https://wordpress.org/plugins/amp/
- AMP.dev: https://amp.dev/documentation/examples/components/amp-carousel/
- ACF Gallery: https://www.advancedcustomfields.com/resources/gallery/
Full code
If you are here just for a working solution, just copy paste the code below. In case you want to understand the principle behind developing amp-carousel, populated with ACF on WordPress, you’ll find the explanation below.
<?php $images = get_field('gallery');
if( $images ): ?>
    <amp-carousel
    lightbox
    width="400"
    height="300"
    layout="responsive"
    type="slides">
    <?php foreach( $images as $image ):
        $image_small = wp_get_attachment_image_src( $image, "thumbnail" );
        $image_medium = wp_get_attachment_image_src( $image, "medium" );
        $image_large = wp_get_attachment_image_src( $image, "large" );
        $alt = get_post_meta( $image, '_wp_attachment_image_alt', true); ?>
        <amp-img
        class="cover"
        src="<?php echo $image_small[0]; ?>"
        srcset="<?php echo $image_medium[0]; ?> 700w,
        <?php echo $image_large[0]; ?> 1024w"
        alt="<?php echo $alt;?>"
        width="300"
        height="200"
        layout="responsive">
    </amp-img>
<?php endforeach; ?>
</amp-carousel>
<?php endif; ?>
Default AMP-Carousel Code
Firstly, before adding amp-carousel to the website, loading carousel component inside the header is required. It is done by adding the code below inside <head> tag, but luckily for us – ever-time-lacking workaholics – AMP for WordPress plugin will do it for us automatically. Hooray for that. In case for whatever reason you don’t want to use the plugin, you’ll have to insert the code to head manually.
<script async custom-element="amp-carousel" src="https://cdn.ampproject.org/v0/amp-carousel-0.1.js"></script>
The example code for amp-carousel from amp.dev is shown below. It works just fine with a static content, but since we work with WordPress CMS, obviously, we want to populate the carousel dynamically.
<amp-carousel width="400"
  height="300"
  layout="responsive"
  type="slides">
  <amp-img src="/static/samples/img/image1.jpg"
    width="400"
    height="300"
    layout="responsive"
    alt="a sample image"></amp-img>
  <amp-img src="/static/samples/img/image2.jpg"
    width="400"
    height="300"
    layout="responsive"
    alt="another sample image"></amp-img>
  <amp-img src="/static/samples/img/image3.jpg"
    width="400"
    height="300"
    layout="responsive"
    alt="and another sample image"></amp-img>
</amp-carousel>
Default ACF Gallery Code
There are many way to do that, but, personally, I use ACF Gallery which is unfortunately only available is PRO version. If you don’t have the Premium plugin – don’t worry – I’m sure there is free alternatives and I bet all you need to do is to replace only this line $images = get_field('gallery'); which populates the gallery. The example code from ACF official website is as it is shown below. It works just fine to return images of gallery, but we want them looping nicely in a carousel, ain’t we?
<?php

$images = get_field('gallery');

if( $images ): ?>
    <ul>
        <?php foreach( $images as $image ): ?>
            <li>
                <a href="<?php echo $image['url']; ?>">
                     <img src="<?php echo $image['sizes']['thumbnail']; ?>" alt="<?php echo $image['alt']; ?>" />
                </a>
                <p><?php echo $image['caption']; ?></p>
            </li>
        <?php endforeach; ?>
    </ul>
<?php endif; ?>
Creating ACF Gallery
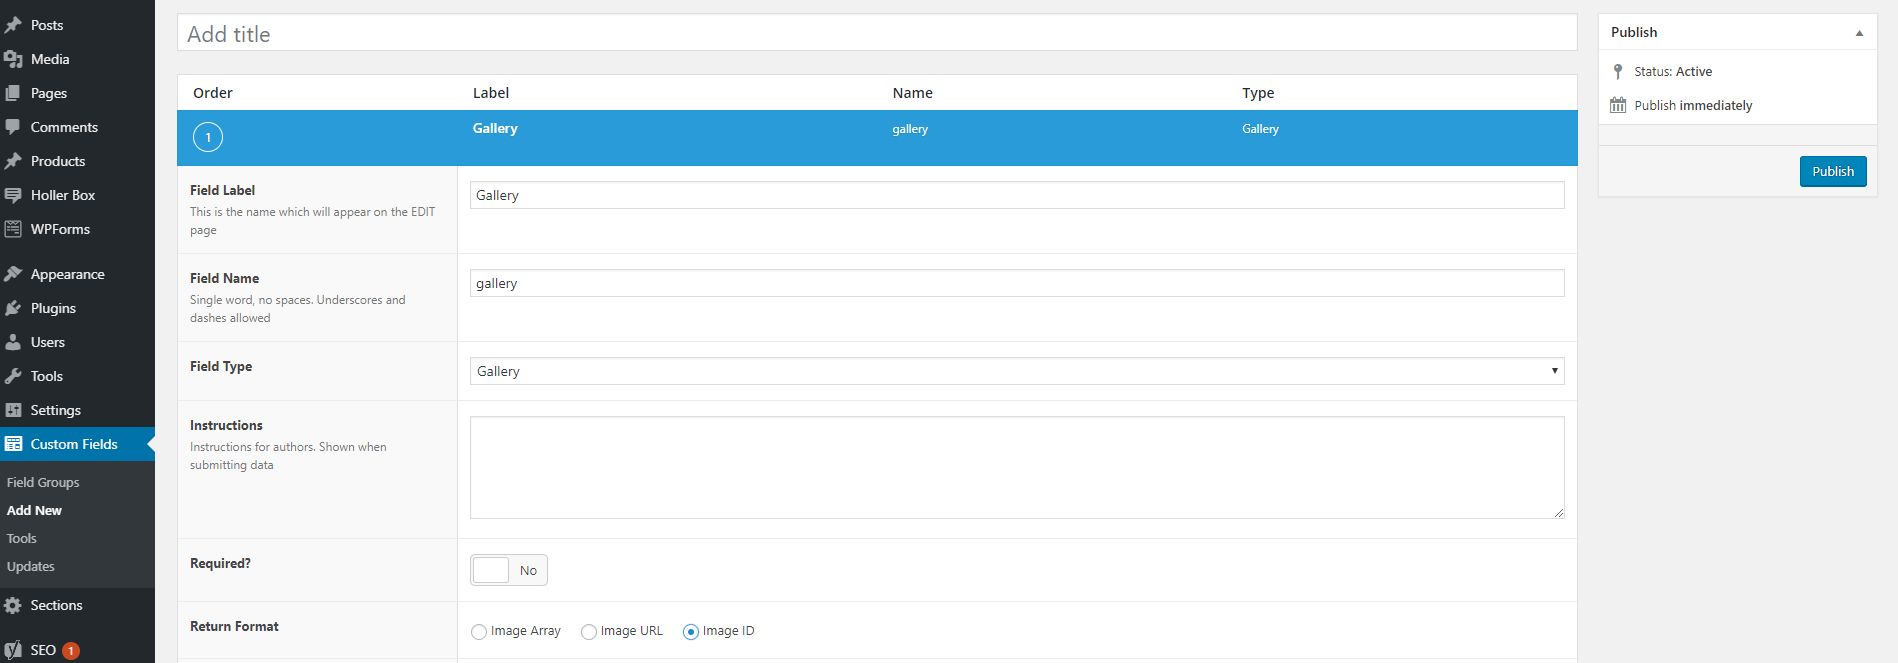
I suggest you to skip this part if you are not using ACF PRO to populate the carousel, or if you already have one. For those who are not quite sure how to do it – after downloading and activating the plugin, first thing you need to do it is to create custom field for it. To achieve that just click on Custom Fields > Add New on your WordPress admin dashboard. Add field and name it whatever you want, but in this example I’ll just going to use simple Gallery. On field type choose Content > Gallery, and on Return Format pick Image ID.

Creating advanced custom fields gallery.
Don’t forget to set the right location for the gallery custom field to appear. As you can see, in this example I use custom page template called Products.


Setting advanced custom fields gallery location.
Adding Images to ACF Gallery
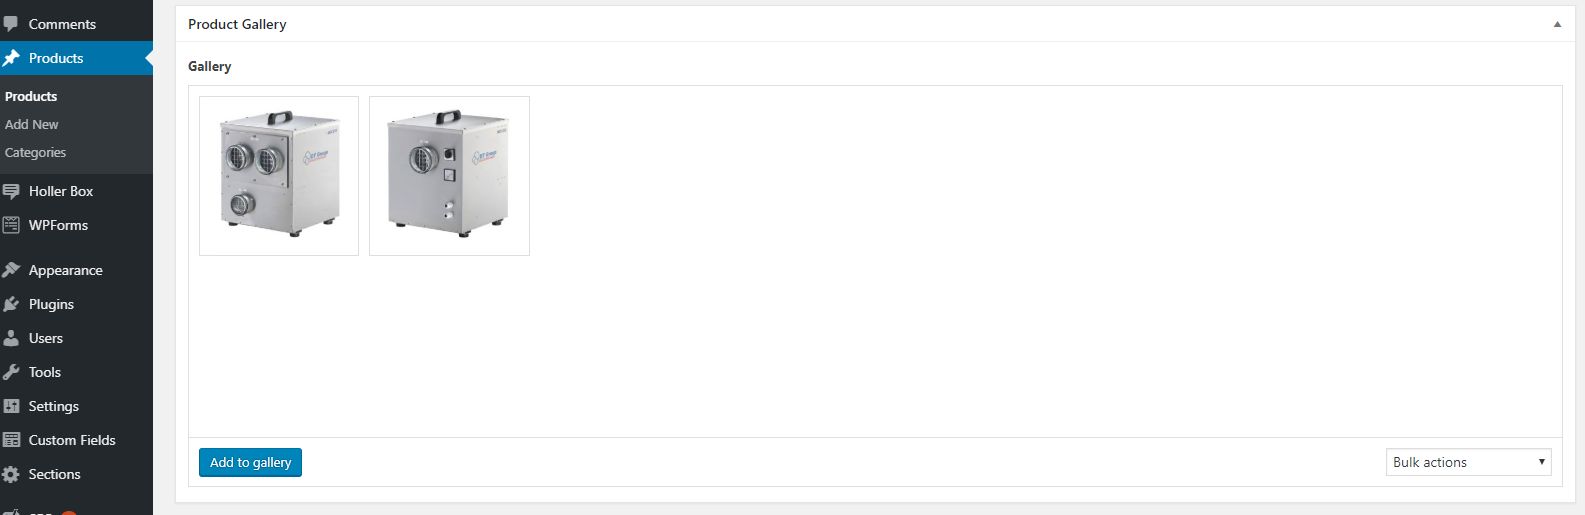
Go to the page you have chosen for the gallery to appear during the last step and find the gallery. Adding images to the gallery is pretty straight forward and is done by clicking Add to gallery button. After you set your images right, don’t forget to save the progress. WordPress is now all set and done, let’s return to the coding.

Adding images to advanced custom fields gallery.
Combining the Code
The principle of combining ACF Gallery and amp-carousel code is not entirely a rocket science either. The key is to understand which part of the loop is repeated and which will be returned only once. First copy/paste the example code given by ACF PRO team and insert the code you want to outputted only once before foreach() line. Don’t forget to close all the tags after endforeach;. At this stage the code should be something like this:
<?php $images = get_field('gallery');
if( $images ): ?>
    <amp-carousel
    lightbox
    width="400"
    height="300"
    layout="responsive"
    type="slides">
    <?php foreach( $images as $image ):

    <?php endforeach; ?>
</amp-carousel>
<?php endif; ?>
All is left is to insert the code we want to be repeated. For our purpose it is amp-img, which will be returned for each images we added to ACF Gallery. For starter take the code of a single image provided by amp.dev.
<amp-img
src="/static/samples/img/image1.jpg"
width="400"
height="300"
layout="responsive"
alt="a sample image"></amp-img>
This, of course, won’t work, because the code is for a static image. What we want is to dynamically populate src=" " and alt=" " attributes. At this stage I’ll use slightly different code than the one provided by ACF PRO, because I prefer working with images returned as ID, not as Array as it is provided in their example. Now we need to set our variables which we are going to echo into the attributes. This is done by this code:
$image_large = wp_get_attachment_image_src( $image, "large" ); // thumbnail, medium, large or full
$alt = get_post_meta( $image, '_wp_attachment_image_alt', true);
Now we need to output $image_large and $alt to the amp-img code above. After this we should end-up with a code like this:
$image_large = wp_get_attachment_image_src( $image, "large" );
$alt = get_post_meta( $image, '_wp_attachment_image_alt', true); ?>
<amp-img
    class="cover"
    src="<?php echo $image_large[0]; ?>"
    alt="<?php echo $alt;?>"
    width="300"
    height="200"
    layout="responsive">
</amp-img>
Improving AMP-Carousel
Finally, that’s it. The full code could be found on the top of the page. The only difference there is that I added srcset="" attribute just to make the images more responsive across the website. The code is great for single slide to be shown at once, like in the example below, but it is possible to make responsive amp-carousel with multiple images.

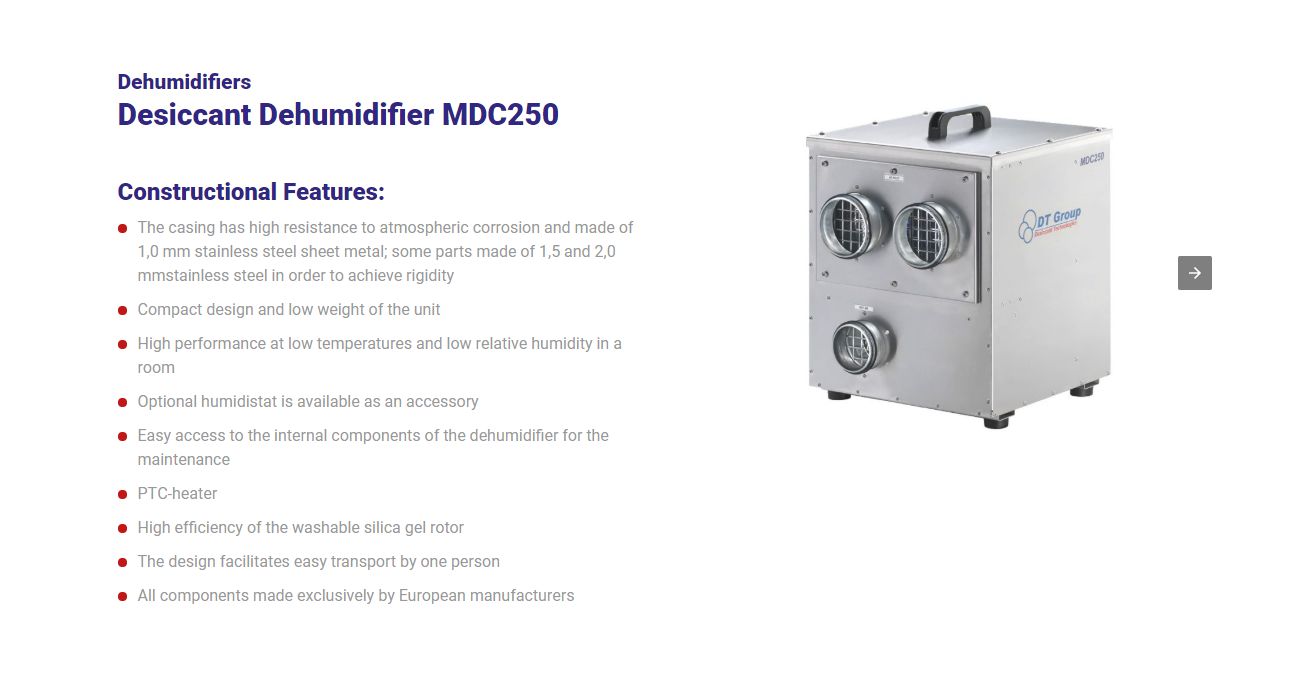
Example of AMP-Carousel made on WordPress wtih ACF.
Modifying Navigation
By default, amp-carousel has this “white arrow with a black background rectangle” navigation. You can customize them by selecting the buttons by using these classes:
- .amp-carousel-button – selecting bot navigation buttons;
- .amp-carousel-button-prev -selecting previous slide button;
- .amp-carousel-button-next – selecting next slide button.
It is also possible to make a thumbnail carousel navigation, or navigation with dots. If you can’t make your amp-carousel to work in a manner you intended it to, consider to hire AMP professional developer.
Originally posted on 8/19/2019
Last updated:2/11/2020
Versions:
WordPress 5.2.2
AMP 1.2